Do This BEFORE Your Next Extensions Install
Traditional Sew-In Extensions + Keratin Treatment: The Ultimate Combo for Healthy Curly Hair
Welcome (or welcome back)! In today’s post, I’m walking you through how I install a traditional sew-in on one of my returning clients and the number one secret that’s helping my curly-haired clients avoid damage and actually grow longer, stronger hair with extensions.
If you’re curious about the best way to prep your natural hair for extensions or you’ve been wondering whether a keratin treatment before a sew-in is worth it, keep reading!

Sew In Extensions Prep
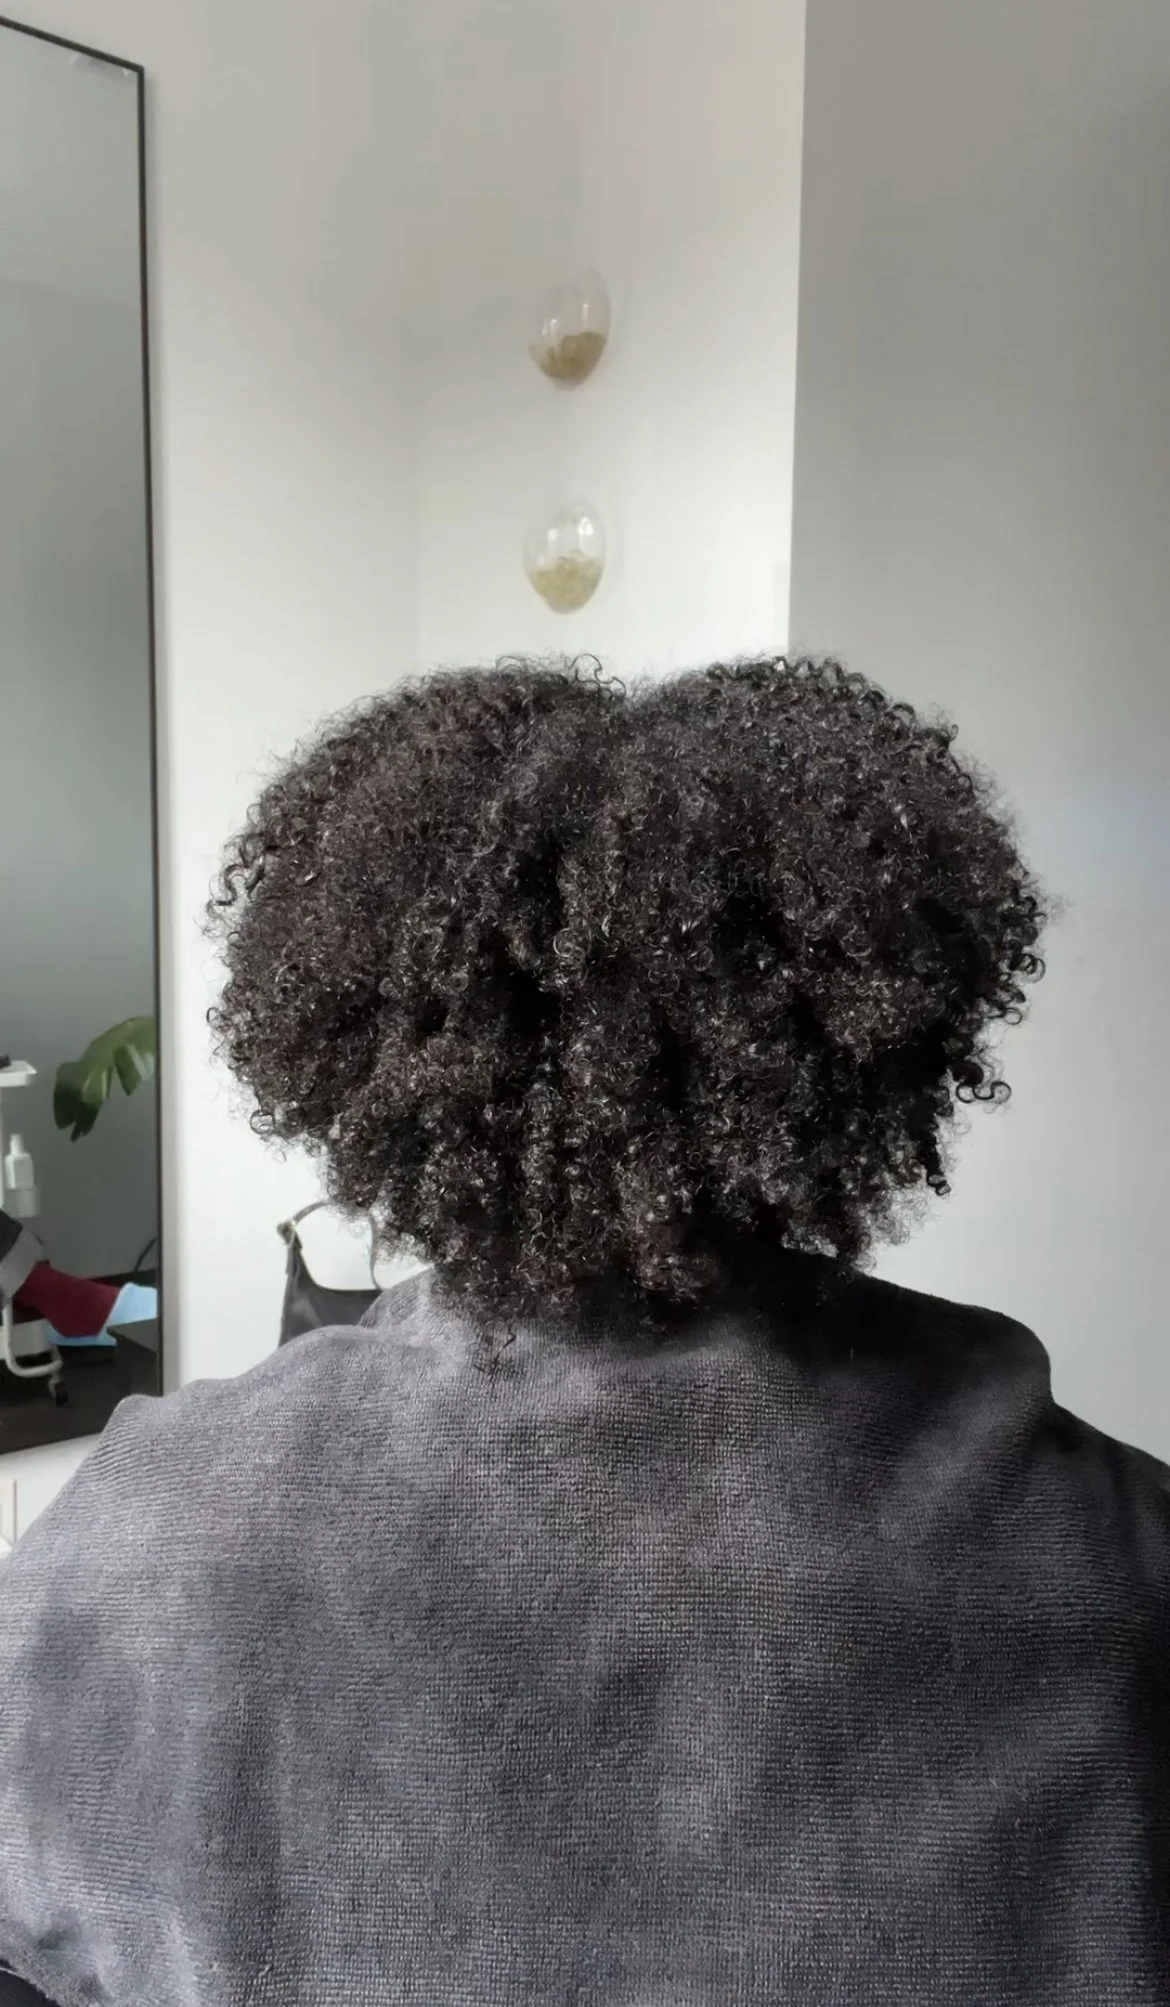
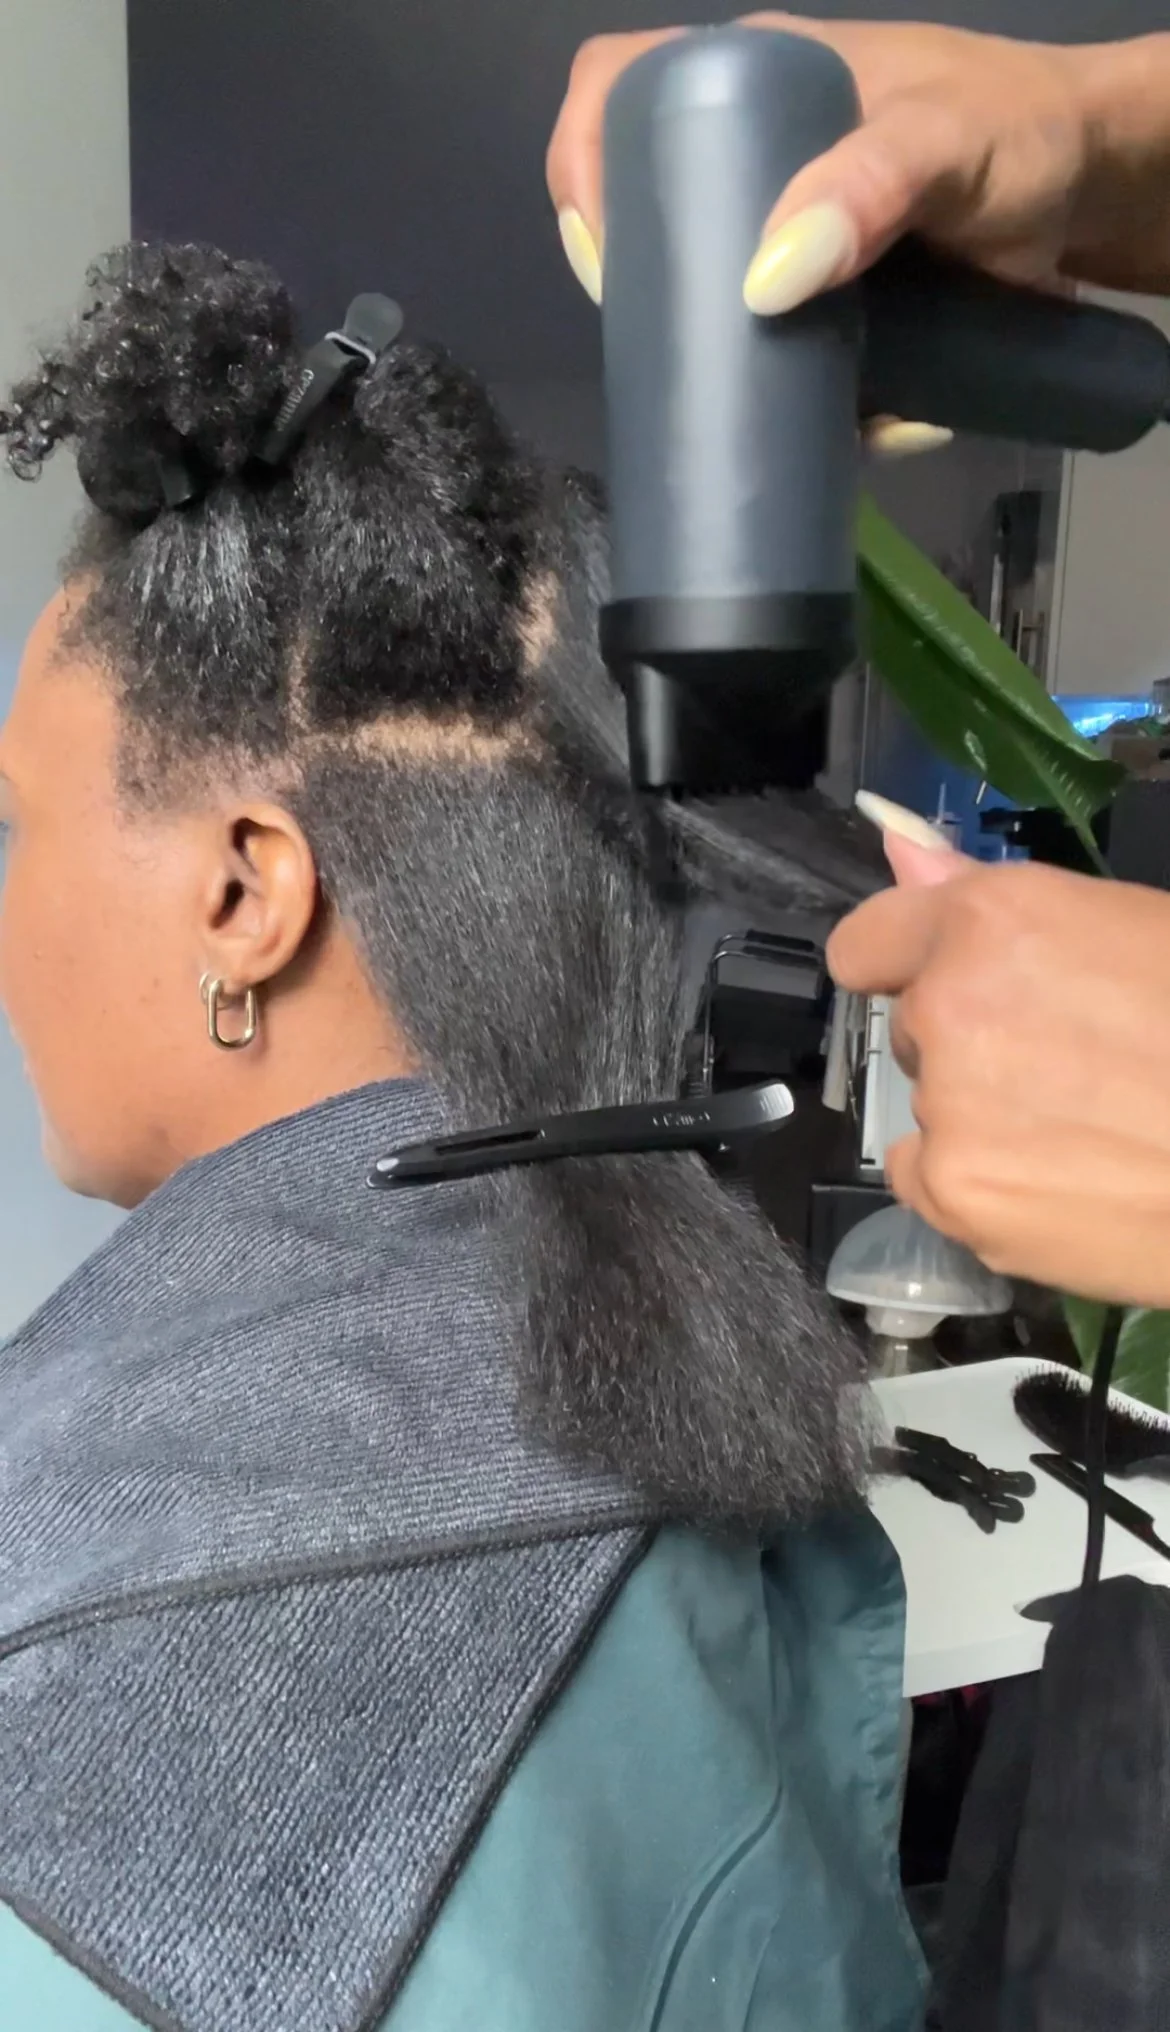
Before installing any type of hair extensions, I always start detox with a clarifying shampoo. This removes buildup, oil, and impurities so I’m working on a clean canvas.
In this case, my client’s curls looked healthy and hydrated. That’s because she came in three weeks prior for her first keratin treatment.
What Is a Keratin Treatment and
Why Do I Recommend It Before Extensions?
So what’s my secret? Keratin treatments. Most of my curly clients get a keratin treatment before any extension install. Here's why:
Reduces frizz
Smooths the cuticle
Makes hair more manageable
Strengthens hair by infusing protein
Gives your curls a gentle stretch without altering your curl type
It creates the perfect base for styles like sew-ins and helps hair remain manageable and less prone to breakage throughout the wear.

Repair and Strengthen Before Protective Styling
After detoxing her scalp, I apply an Olaplex treatment. Unlike keratin (which smooths and strengthens with protein), Olaplex works by repairing broken bonds inside the hair shaft. This ensures that even if the hair was previously damaged, it’s strong and healthy underneath the extensions.
I always recommend pairing Olaplex with a keratin treatment because it prolongs the keratin results without stripping them. It strengthens from within, while keratin works on the outer layer.

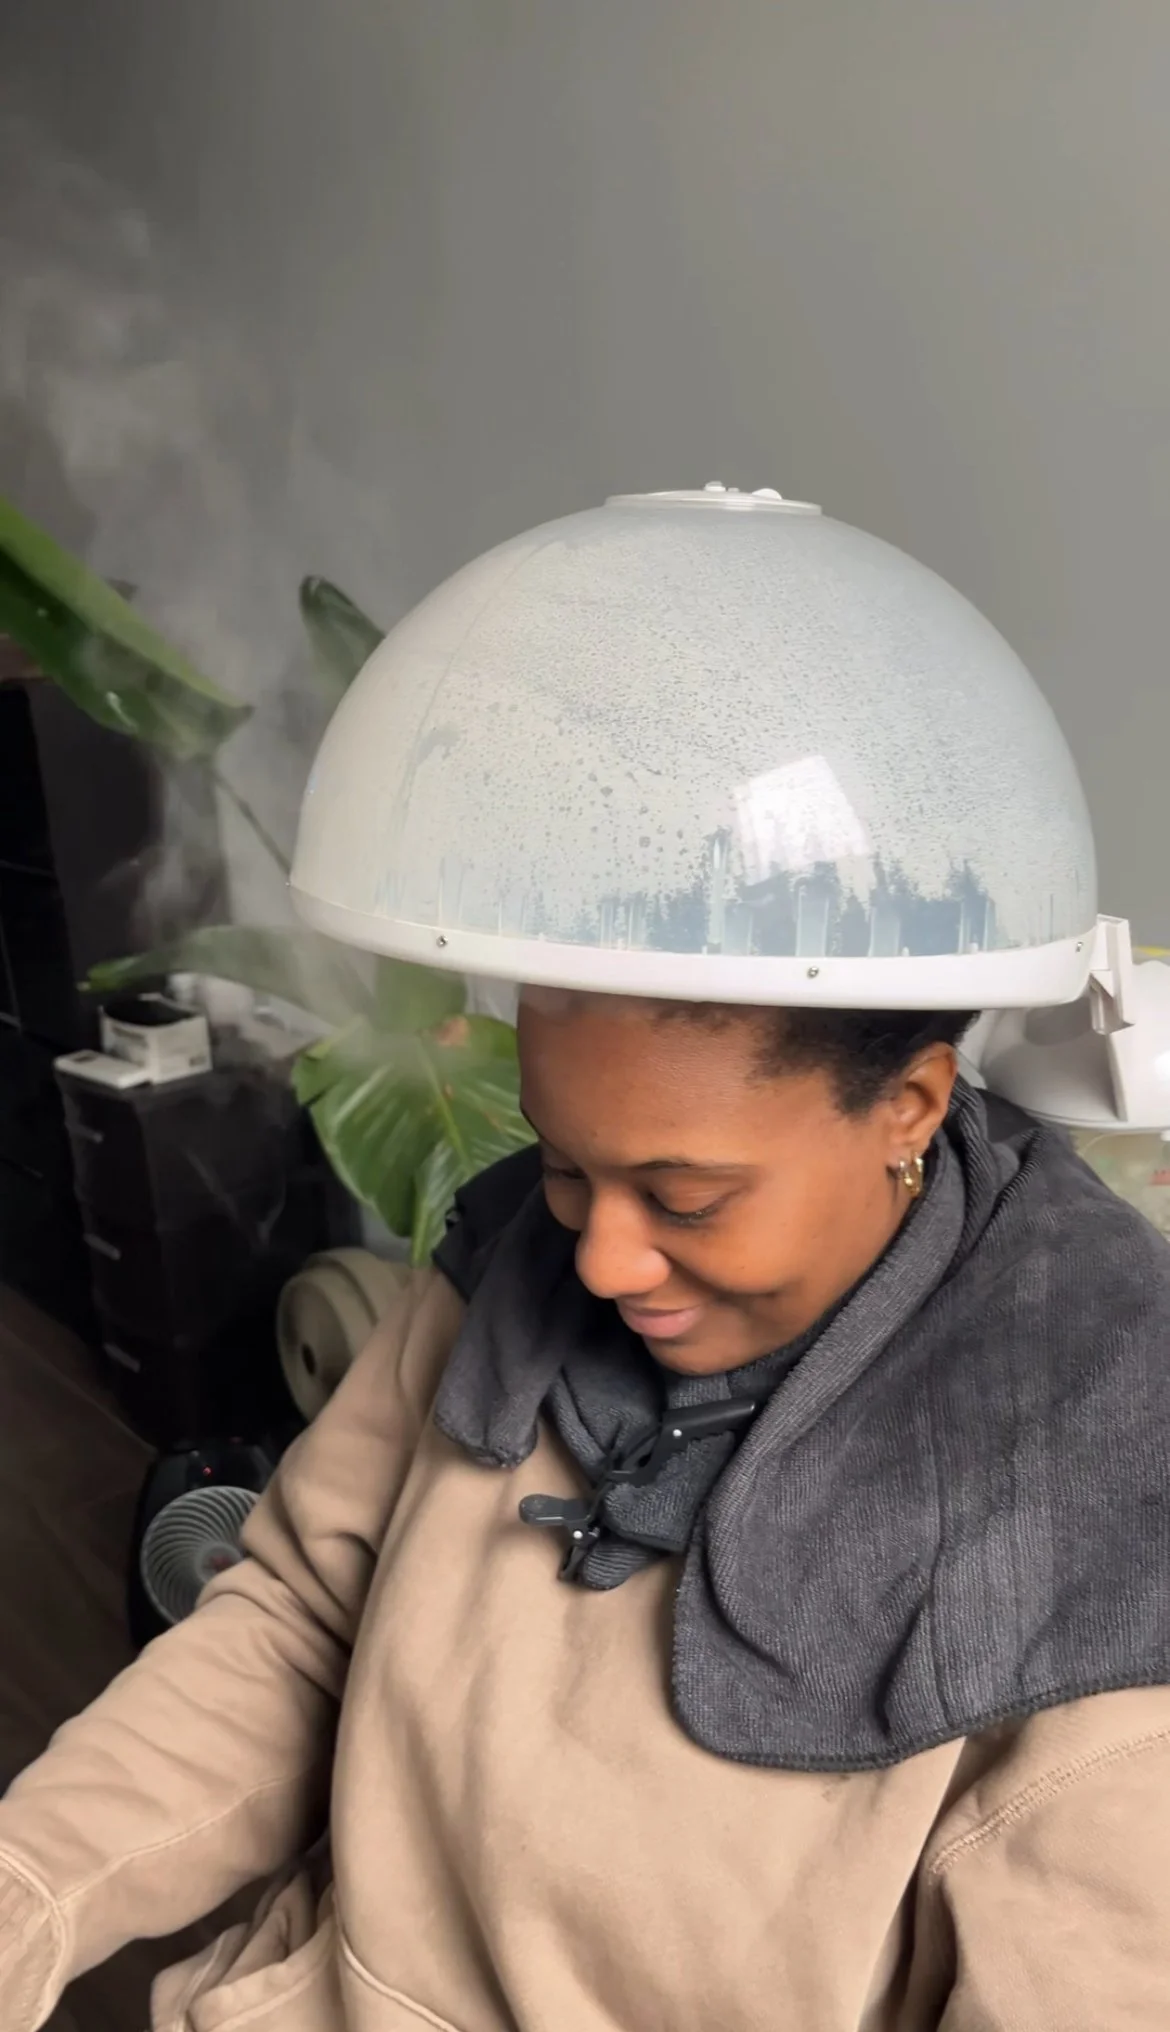
I always follow up with a steam treatment. Steaming deeply hydrates the hair and scalp, which is key before installing a protective style like a sew-in. Since your natural hair won’t be exposed to moisture as often, I pack in as much hydration as possible now to protect the hair long-term.
Products to Protect Keratin Treated Hair
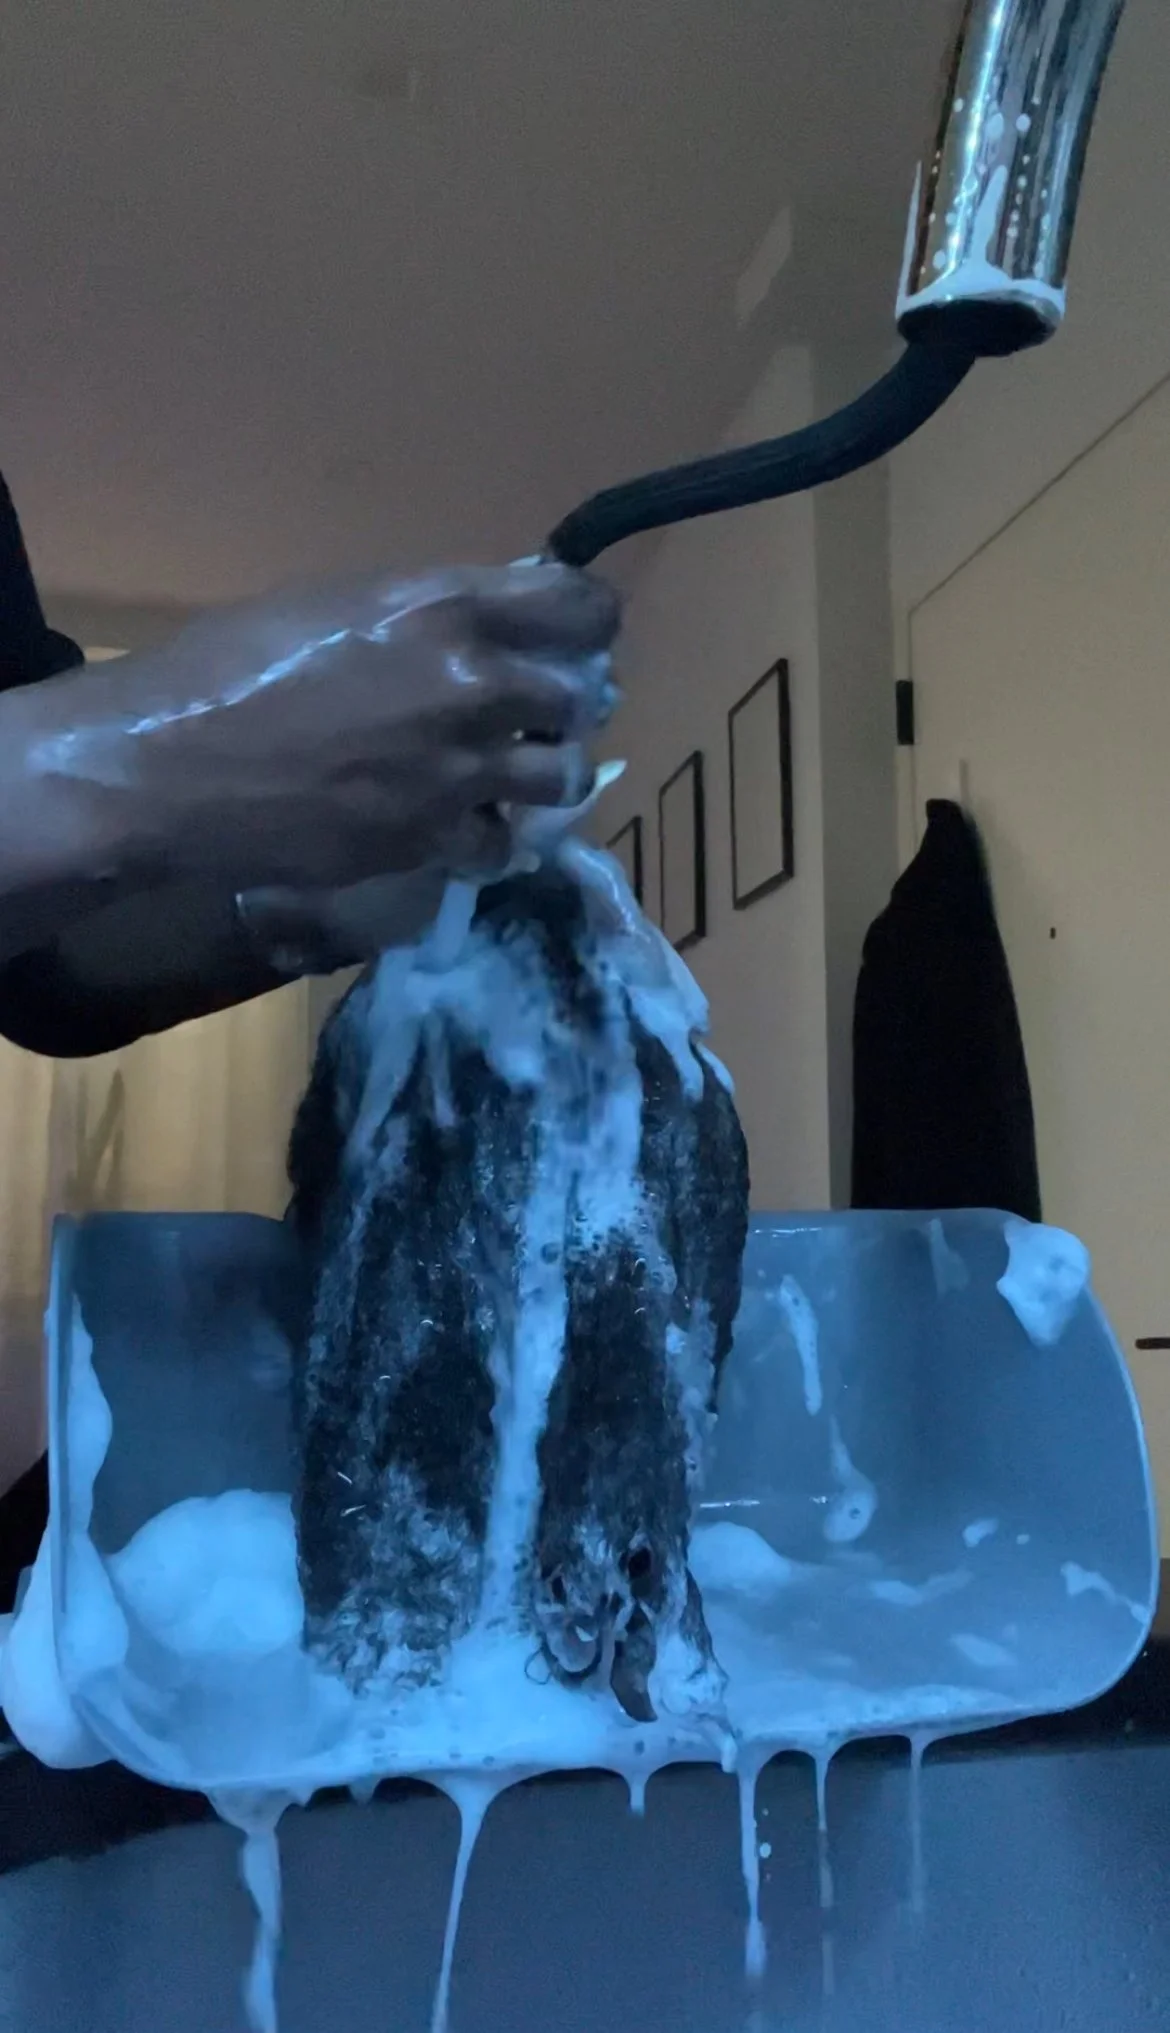
After steaming, I rinse out the Olaplex with a moisture-rich shampoo that is both color-safe and keratin-safe. This step is crucial: shampoos that strip keratin can undo all your treatment benefits. My go-to shampoo leaves the hair clean, soft, and moisturized without leaving any heavy residue.

Bring your hair back to life with our Moisture Shampoo. This creamy, nourishing formula is designed to infuse your strands with long lasting hydration while keeping them light, bouncy, and full of movement. Unlike heavy moisturizing shampoos that can leave buildup behind, this one delivers the perfect balance: deep hydration without weighing your hair down.
Features:
Gently cleanses while replenishing moisture to dry hair
Creamy, rich formula leaves hair soft, hydrated, and manageable
Keeps hair weightless, making it perfect before blowouts or silk presses
Strengthens and nourishes from root to tip
Safe for all textures, including fine hair, extensions, and color-treated strands
Benefits:
Your hair feels hydrated, silky, and smooth after every wash
Perfect second step after the Volume Shampoo for a balanced cleanse
Preps your strands for styling by keeping them moisturized and pliable
Helps prevent dryness, frizz, and breakage between wash days
With Moisture Shampoo, every wash day leaves your hair hydrated, soft, and ready for whatever style you choose, whether it’s a blowout, silk press, or natural curls.
What’s inside:
SUNFLOWER SEED EXTRACT: provides UVA and UVB protection to preserve radiant color.
COCONUT MILK: creates a strong barrier around the hair shaft to prevent breakage.
RHODOCHROSITE: balances moisture levels.
How to Use:
SHAMPOO: wet hair and lather from roots to ends. Rinse well. Repeat if necessary.
CONDITIONER: after cleansing with shampoo, apply evenly from roots to ends. Leave in for 2-3 minutes and rinse well.
Next up is the Deep Repair Treatment, which is my salon's bestseller. It delivers slip for easy detangling, serious moisture, and strength without weighing the hair down. This product also contains keratin, helping to prolong the smoothing effects of her earlier treatment.
It’s perfect for clients with fine to medium hair because it moisturizes without greasy buildup.

Give your hair the ultimate reset with our Deep Repair Treatment. Formulated with the perfect balance of strength and hydration, this intensive mask revives dry, damaged strands while keeping them soft, defined, and healthy. Infused with keratin protein and rich moisturizers, it works from the inside out to repair, fortify, and restore your hair’s natural beauty.
Features:
Deeply hydrates while reinforcing strands with protein
Infuses keratin to strengthen and protect against breakage
Restores elasticity so curls clump, pop, and define
Improves softness, shine, and manageability
Ideal for hair that is heat styled, color treated, or prone to dryness
Benefits:
Hair feels instantly stronger and more moisturized
Visible results, curls spring back with bounce and definition
Keeps straight naturals and curly girls alike protected from heat and stress
Perfect for weekly deep treatments or paired with a steam treatment for maximum absorption
When your hair needs both moisture and strength, the Deep Repair Treatment delivers. It’s the key to keeping your strands resilient, hydrated, and full of life.
What’s inside:
SUNFLOWER OIL + MALACHITE: restore moisture, shine, and resilience while protecting hair from environmental stressors.
RHASSOUL: a mineral rich clay, makes this a great treatment for even finer textured hair.
How to Use:
Apply to clean towel dried hair and leave in for 5 to 15 minutes, then rinse. Tip: Focus on mid-lengths to ends to help prevent split ends.
Prepping for the Blowout
I prep her for the blowout with my go-to Emergency Miracle Treatment leave-in conditioner. I never skip this step as it adds moisture and helps your style last longer.
For heat protection, I use Le Deux blow dry cream, which offers both moisture and heat defense. This combo prevents the dry, crunchy feeling blowouts can sometimes cause and keeps the hair soft and manageable.
To seal in moisture and cut down blow-dry time, I apply Amethyst Oil. It adds shine, protects from heat, and leaves the hair silky-smooth.

Achieve salon smooth results at home with the Silky Smooth Bundle. This trio delivers the perfect combination of hydration, protection, and shine to keep your hair silky, frizz-free, and healthy, whether you’re blow drying, silk pressing, or wearing your hair straight.
What’s Inside:
Emergency Miracle Treatment – Lightweight leave-in conditioner that penetrates deep for long-lasting moisture and frizz control.
Le Deux – Moisture rich blow dry cream that smooths strands, eases detangling, and protects from heat while giving your blowouts body and softness.
Amethyst Oil – Lightweight finishing oil that seals in moisture, locks in shine, and provides extra heat protection without weighing hair down.
Benefits:
Creates a smooth, sleek foundation for blowouts and silk presses
Double layered heat protection keeps strands safe from hot tools
Locks in hydration so hair stays soft, shiny, and manageable
Works for all hair types, especially straight naturals and those who heat style regularly
With the Silky Smooth Bundle, you’ll have everything you need to create polished, frizz-free styles that last. All while keeping your hair healthy and hydrated.

The Benefits of a Keratin Treatment for Curly Hair
(Especially Before Extensions)
Let’s talk about why keratin treatments are a game-changer for curly hair:
Reduces frizz and makes curls less reactive to humidity
Simplifies detangling, reducing breakage and shedding
Strengthens hair with added protein
Softly stretches curls for easier blending with extensions (without changing your curl type)
Want to learn more? I have a full keratin treatment playlist on YouTube showing different curl types and real results.
After the blowout, I braid her down using Flex Paste braiding gel. This gel has tiny molecules that hold the braids in place but absorb into the hair without buildup. That means the scalp stays moisturized and breathable, which is perfect for clients who want to wash their hair during wear.

Say goodbye to heavy braiding gels that cause buildup, dryness, and scalp irritation. Flex Paste is your go-to styler for braids, twists, and protective styles. Its lightweight, nourishing formula penetrates the hair instead of sitting on top, giving you flexible hold without blocking out essential moisture.
Benefits:
Perfect for braiding, twisting, and protective styles
Lightweight formula that won’t clog your scalp or dry out your hair
Keeps styles neat, flexible, and touchable
Nourishes while styling, promoting a healthy scalp and growth-friendly environment
What’s inside:
Pumpkin Seed Protein – Strengthens and nourishes hair, improving manageability while keeping it soft and healthy.
Bentonite Clay – Provides natural, moveable hold and scalp protection without flaking or buildup.
Unlike heavy gels, Flex Paste gives you clean, hydrated styles that last with no flaking, no crust, and no dryness.
How to Use:
Apply desired amount to damp or dry hair and style away!
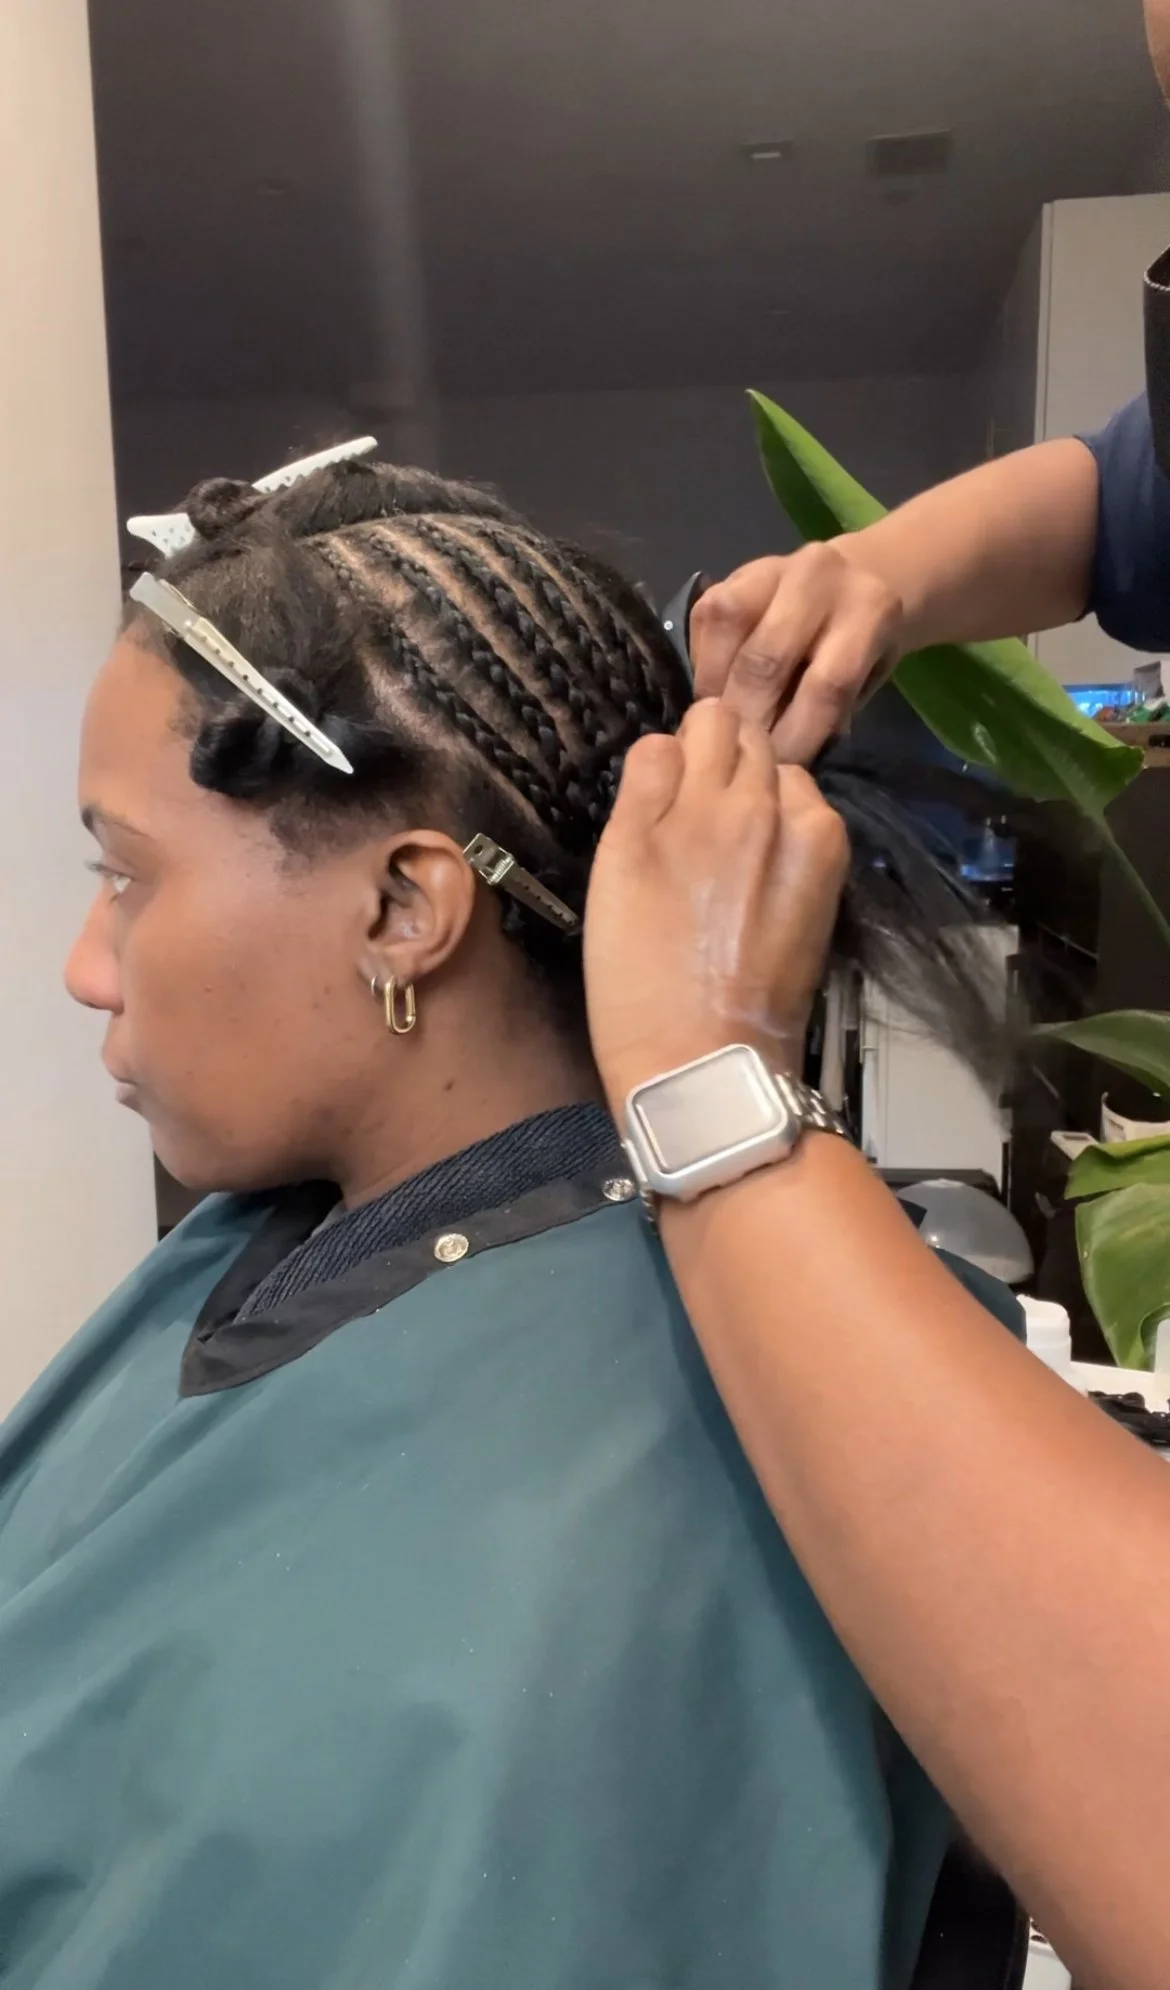
I skip the hair net and instead use braiding hair to reinforce the base. This keeps the scalp accessible and the style long-lasting.
To soothe her scalp post-braid, I apply Amethyst Oil one last time. This will help ease any tension and prevents post-braid itchiness.

Seal in shine, lock in moisture, and protect your hair with Amethyst Oil. This lightweight finishing oil is designed to penetrate the hair shaft, delivering long-lasting hydration without weighing your hair down. Perfect for both blowouts and silk presses, it doubles as an extra layer of heat protection while keeping your hair soft, smooth, and frizz-free.
Features:
Provides a second layer of heat protection for styling
Lightweight formula that absorbs quickly without buildup
Seals in moisture from your creams and leave-ins
Leaves hair silky, shiny, and frizz-free
Works on natural hair, relaxed hair, and extensions
Benefits:
Protects against dryness from hot tools
Adds natural shine without greasiness
Perfect as the final step before a silk press or as a daily shine oil
Fine-hair friendly — no heavy residue or weighed-down strands
Whether you’re blowing out, silk pressing, or simply refreshing your look, Amethyst Oil is the perfect finishing touch for healthy, shiny, and protected hair.
What’s inside:
• HEMP SEED PROTEIN: fights fly-aways and frizz. Soothes scalp.
• AMETHYST: protects the hair from hot tools up to 410 degrees and
speeds up blow dry time.
How to Use:
ON WET HAIR: apply a few drops concentrating on the mid-lengths and ends. Comb through to distribute evenly. Style as usual.
ON DRY HAIR: lightly apply and work through hair for added shine and to tame fly-aways.
TREATMENT: apply throughout scalp and hair, cover with a plastic cap for 20 minutes to an hour. Shampoo and condition hair as regular.
What Is a Traditional Sew-In & Why Is It Great for Natural Hair?
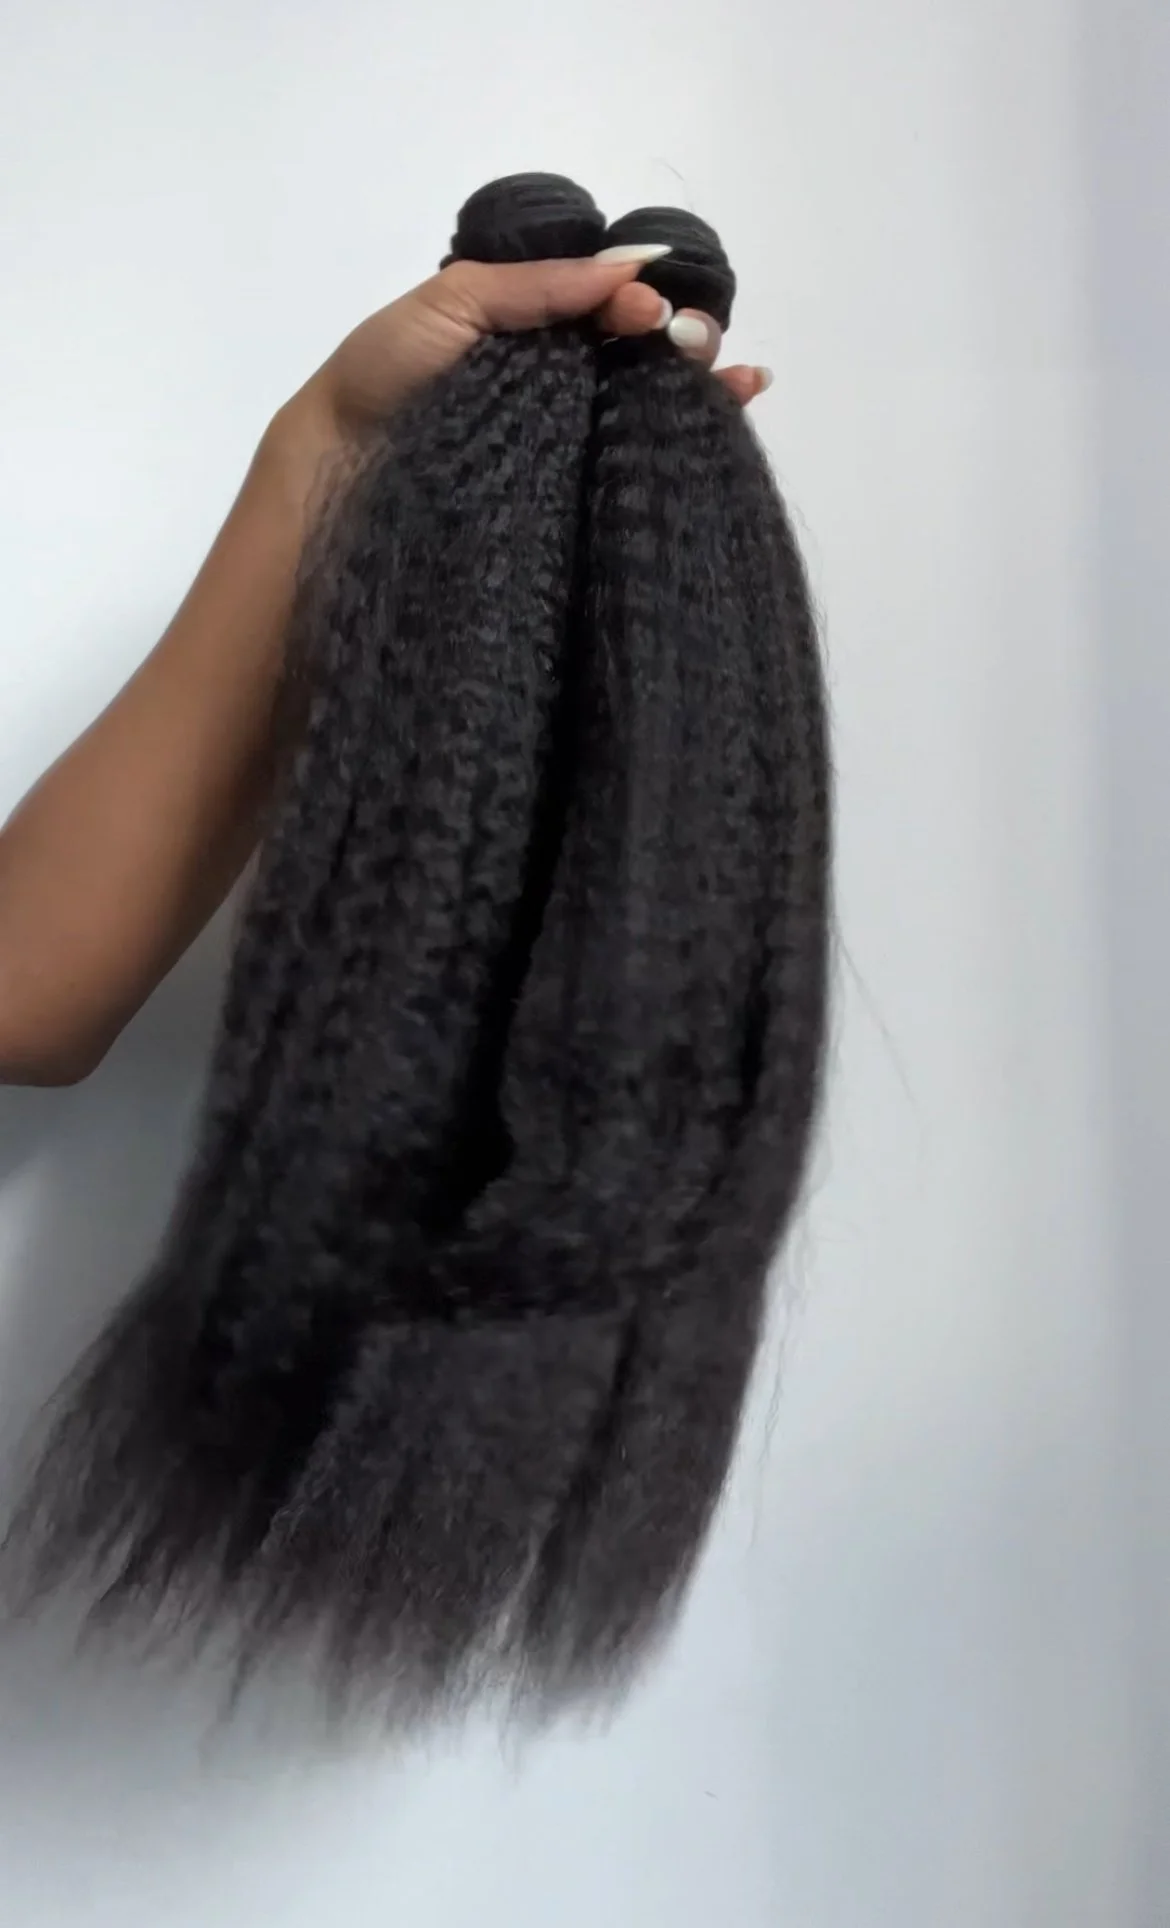
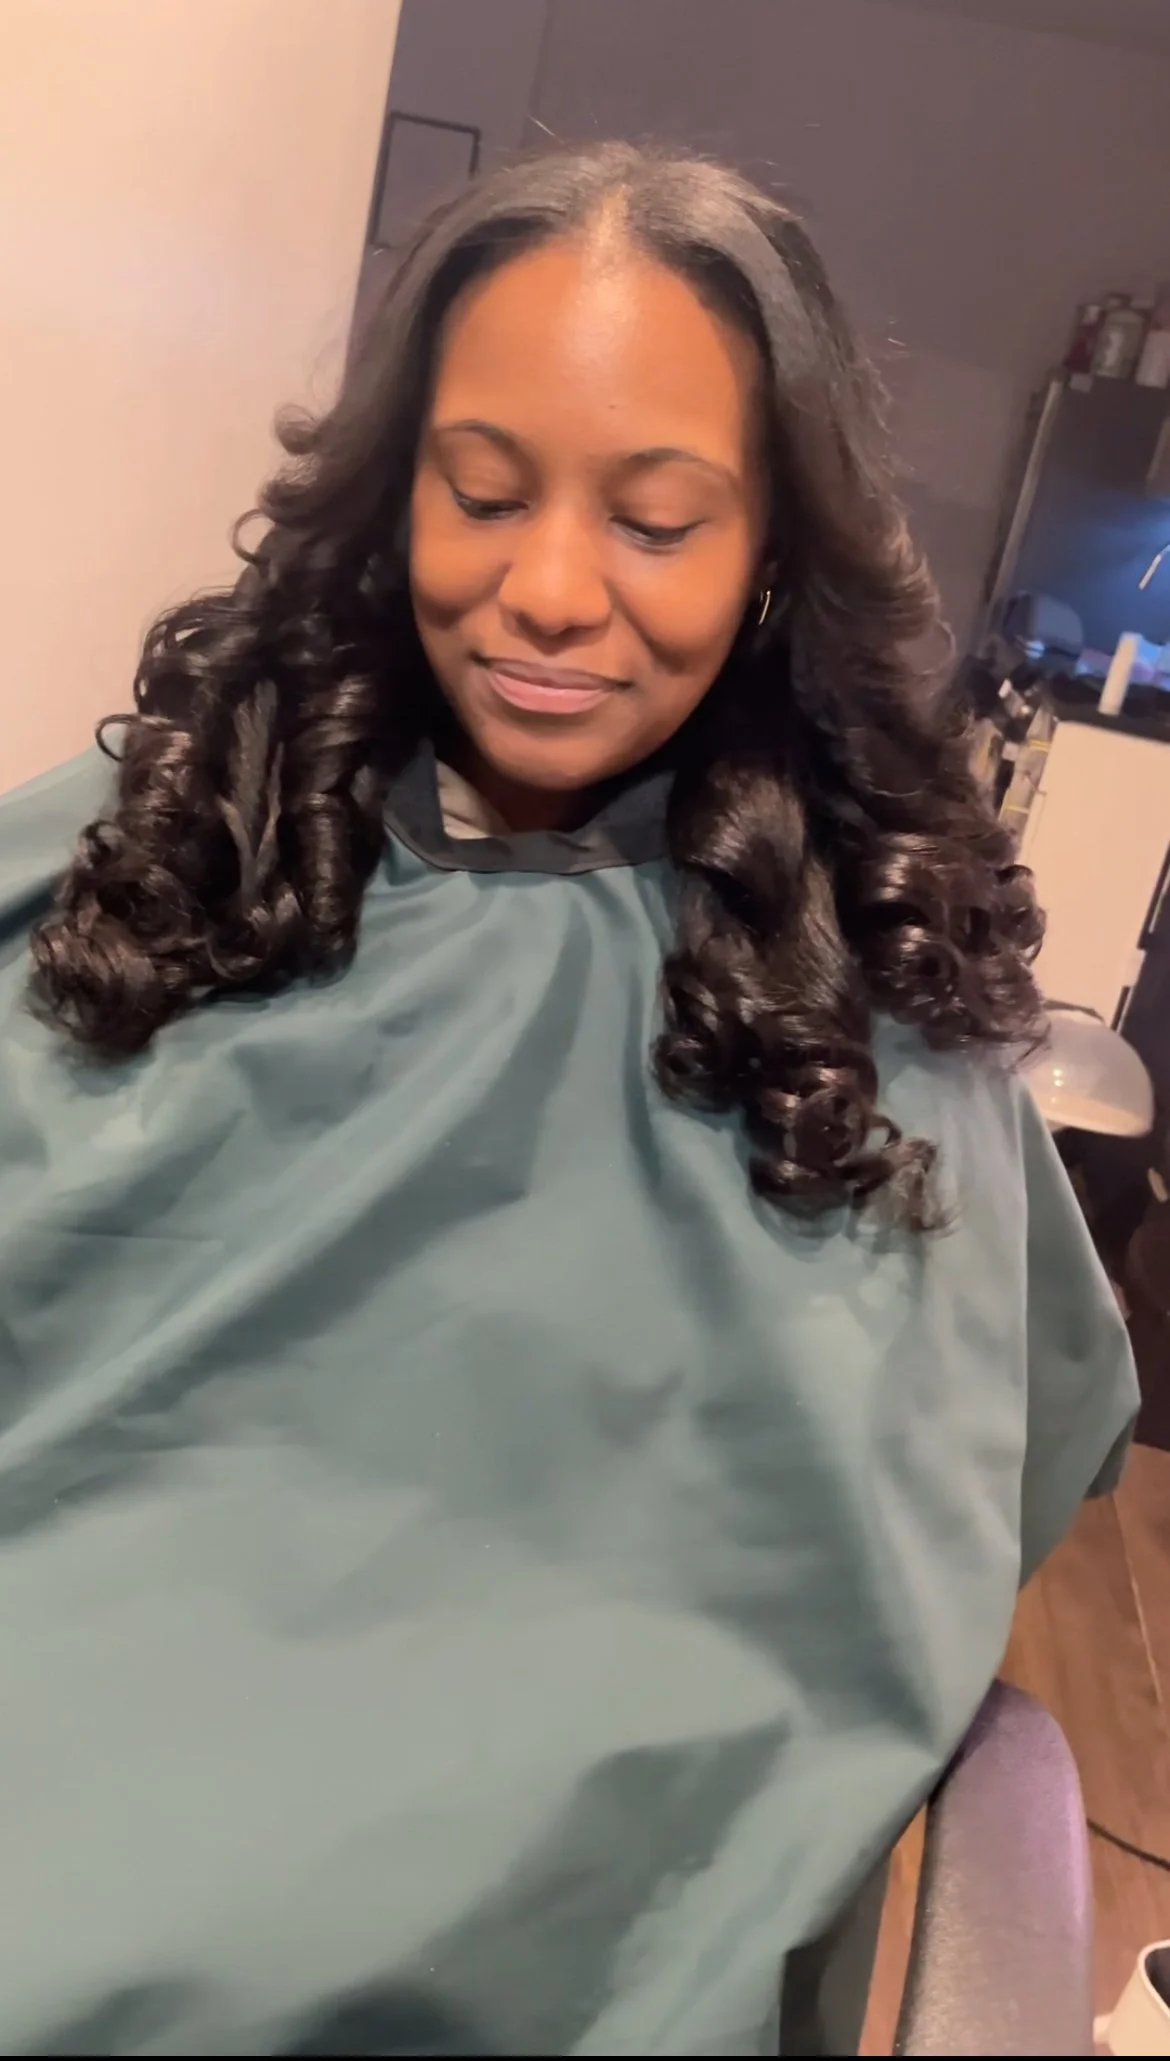
For this look, I’m using 20" kinky straight Cambodian hair extensions. I only need two bundles because look how full they are! This texture blends beautifully with natural hair and straightens like a dream.
Let’s cover some of the top benefits of traditional sew-in extensions:
Protective styling: Most of your hair is braided and tucked away
Low manipulation: Even with leave-out, you’re not constantly styling your natural hair
Versatility: Try different looks while your real hair grows
Washable: You can still wash your hair and scalp, unlike with some twist or braid styles

Pairing Keratin Treatments and Sew-Ins:
The Ultimate Duo for Curly Hair
Here’s why these two treatments work so well together:
Keratin preps the hair to handle tension from braids/extensions
Smoother texture = better blend with extensions
Humidity resistance keeps your styles lasting longer
Less flat ironing needed on your leave-out, preserving hair health
Maintenance Tips:
How to Care for Sew-Ins with a Keratin Treatment
To keep your install looking and feeling fresh:
Wash your hair every 1–2 weeks using an applicator bottle for easy scalp access
Use lightweight conditioner to avoid buildup around the tracks
Minimize heat on your leave-out—use heatless styling when possible
Always use a heat protectant if flat ironing is needed
Final Look:
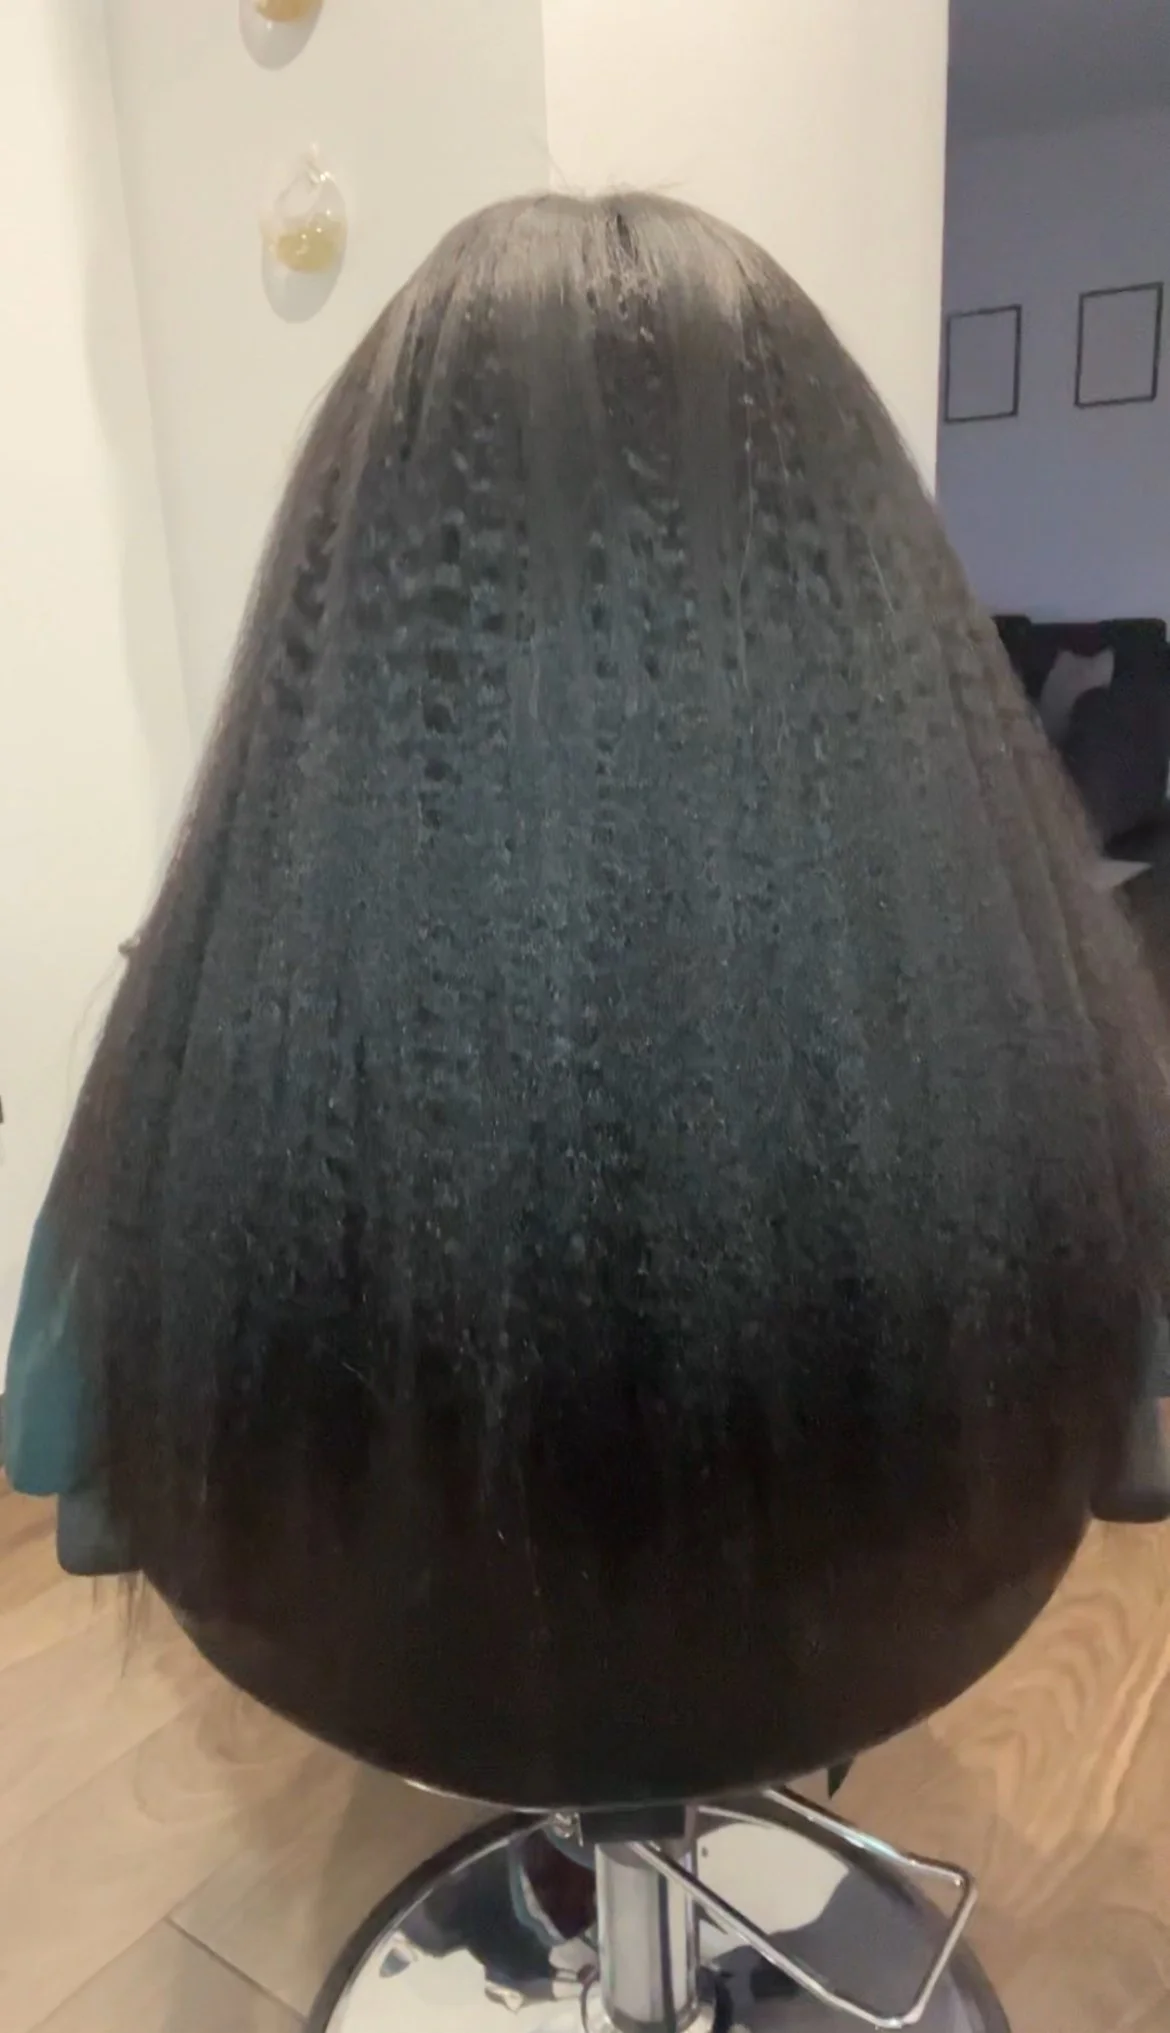
Can we take a moment for this final look? Her keratin treatment and kinky straight bundles give her the perfect blend of volume, length, and manageability. Only two bundles, and the hair is still full and flowy.
Want to know why sew-ins are the best protective style for natural hair? Be sure to read this blog post.
Until next time! Keep those curls moisturized and protected!